SwaggerUI, which was previously bundled with .NET Core APIs, has been dropped in .NET 9. However, .NET Core Web APIs still support generating OpenAPI documents. .NET Core apps have built-in support for generating information about endpoints and it uses Microsoft.AspNetCore.OpenApi package for that. To configure interactive UIs for these OpenAPI documents, we have several options. We are going to explore these two:
- Swashbuckle SwaggerUI
- Scalar
Create a new project, if does not have an existing
Execute these commands in a sequence
dotnet new sln -o DotnetOpenApiDemo
cd DotnetOpenApiDemo
dotnet new webapi -n OpenApiDemo.Api
dotnet sln add .\OpenApiDemo.Api\

## command to open the folder in the vs code, skip the step if you use other IDE/editor
code .
Now, this project is opened in the vs code. If you use other IDE/Editor then open it there.
I have cleaned up some boilerplate from the Program.cs and make it look like this:
var builder = WebApplication.CreateBuilder(args);

builder.Services.AddOpenApi();

var app = builder.Build();

if (app.Environment.IsDevelopment())
{
    app.MapOpenApi();
}

app.UseHttpsRedirection();

app.Run();
Adding some endpoints
app.MapGet("/api/people", () =>
{
    return Results.Ok("People list");
});

app.MapPost("/api/people", () =>
{
    return Results.Ok("Resource is created");
});

app.MapPut("/api/people", () =>
{
    return Results.Ok("Resource is updated");
});

app.MapDelete("/api/people/{id}", (int id) =>
{
    return Results.Ok($"Resource with id:{id} is deleted");
});
Option 1: Using the Swashbuckle SwaggerUi
Install this package:
dotnet add package Swashbuckle.AspNetCore.SwaggerUi
Add this line in the Program.cs
if (app.Environment.IsDevelopment())
{
    app.MapOpenApi();

    app.UseSwaggerUI(options =>
    {
        options.SwaggerEndpoint("/openapi/v1.json", "v1");
    });
}
Open the Properties/launchsettings.json and go to the https section
- Set
launchBrowsertotrue - Add a property
launchUrland set it’s value toswagger
Your code should look like this:
   "https": {
      "commandName": "Project",
      "dotnetRunMessages": true,
      "launchBrowser": true,
      "launchUrl": "swagger",
      "applicationUrl": "https://localhost:7241;http://localhost:5008",
      "environmentVariables": {
        "ASPNETCORE_ENVIRONMENT": "Development"
      }
    }
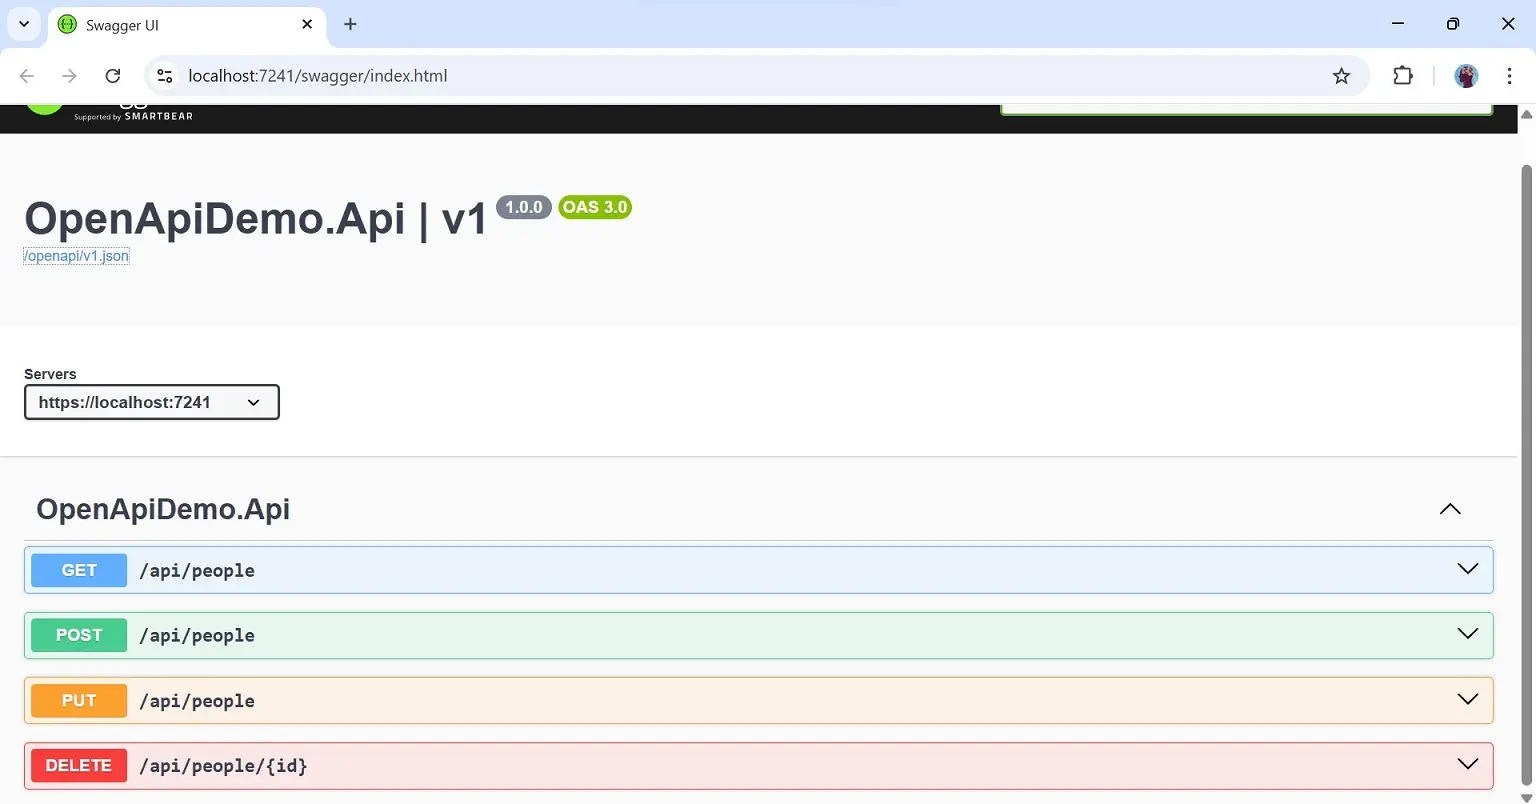
Now run the project as shown below:
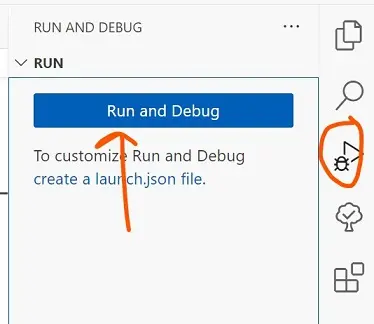
Our old buddy swagger ui is back
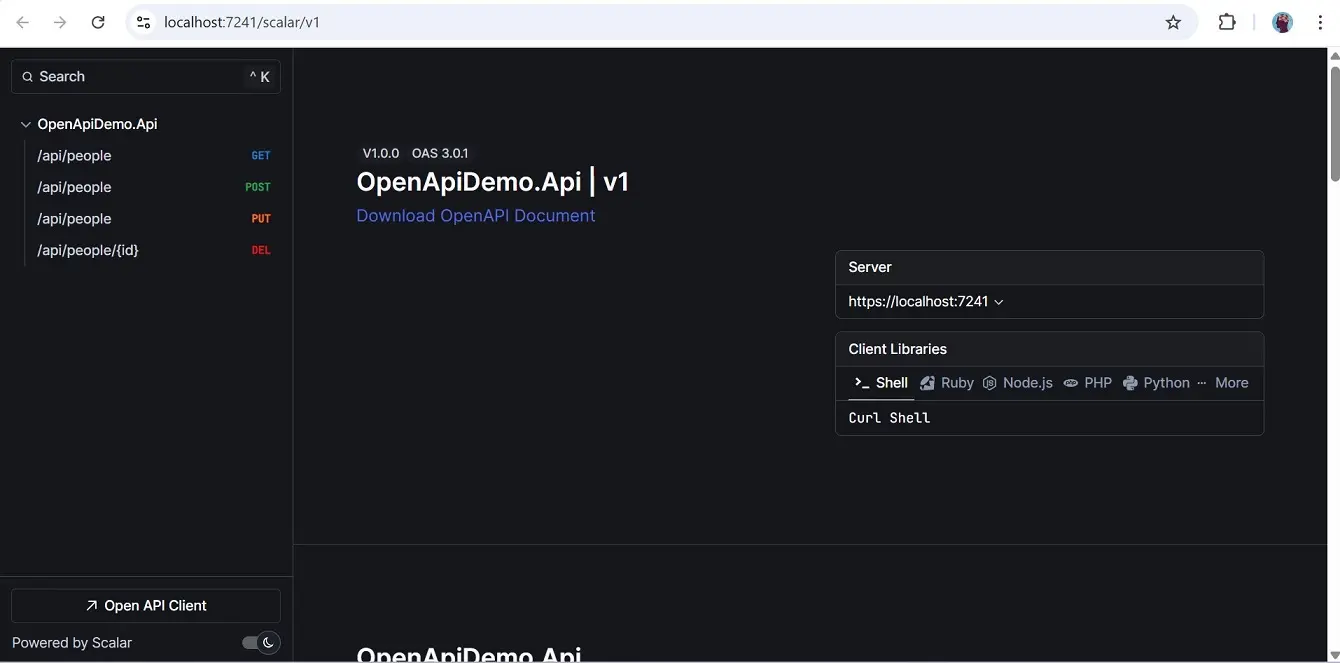
Option 2: Using Scalar
Install this package:
dotnet add package Scalar.AspNetCore
Add this line app.MapScalarApiReference(); in the Program.cs
if (app.Environment.IsDevelopment())
{
    app.MapOpenApi();
    app.MapScalarApiReference();
}
Open the Properties/launchsettings.json and go to the https section
- Set
launchBrowsertotrue - Add a property
launchUrland set it’s value toscalar/v1
Your code should look like this:
   "https": {
      "commandName": "Project",
      "dotnetRunMessages": true,
      "launchBrowser": true,
      "launchUrl": "scalar/v1",
      "applicationUrl": "https://localhost:7241;http://localhost:5008",
      "environmentVariables": {
        "ASPNETCORE_ENVIRONMENT": "Development"
      }
    }
Now run the project and play around scalar.